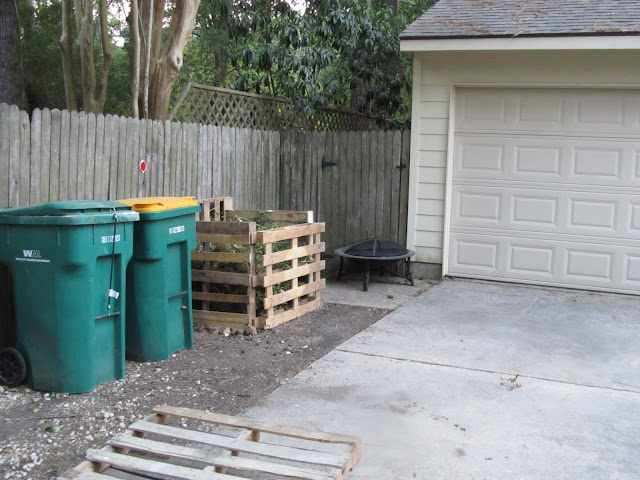
My current composting situation was not cutting it. . .
Due to the Raccoons of NIMH getting in our trashcan as always and tearing open our trash bags, which was also during a period of high temperatures, which caused a million flies to get into our trash, which then caused our trash can to literally bubble over with maggots as I opened the trashcan to put a bag in which caused me to scream - said maggots found their way to the compost pile which became a nasty mess of flies which then got torn into by the armadillos that live next door which destroyed my compost pile as seen in the above picture.
Sigh.
We were in the middle of constructing the chicken palace, and so I did not want to buy anything more, so buying the compost bin I would like (or making one that looks like it) were out of the question.
C.E. Shepherd compost bin
So I thought - what is free that I could use to make one that is a little more sturdy (at least until I can buy the one I want)? Pallets are free. Lemme try that.
So we scrounged up a few pallets from a local hardware store and a grocery store (the story that accompanies this process could be its own blog post) and brought them home.
I wanted to have a two bin system like I (kind of) had, so I figured I would need 7 pallets (2 for the back, 2 for the sides, one for the middle divider, and two to cover the front). Once I laid them all out (and killed a brown recluse spider living in one of them) I separated them into similar sizes and shapes. For some reason I had thought that pallets came in a standard size and shape. Nope.
So I removed my old arrangement and started to build it in place - those things are a lot heavier than you would think. . .
I screwed the side to the back piece with a 3 in deck screw (because that's what I had) towards the top of the pallet. That's all I did - it was sturdy enough.
I then added the other pieces in a similar way. The divider between the two sides was a little different - because of the way it was shaped, I was able to wedge it between the two back pieces and screw it in to both of them.
I then stood back and looked at my work. I thought it looked pretty darn good. But it was huge. And it actually kind of looked like a pen for a farm animal. And since I was still in covert chicken operation mode, I knew this simply would not work. It was very noticeable from the street, and I knew it would be a red flag for HOA enforcers, and I really didn't want to attract them to my property. So, I decided to disassemble it and go for a 1 bin setup for the time being.
I think it actually ended up looking pretty nice! It provides a perfect hiding place for snakes behind it, but other than that, it is fine for now. The front is simply propped up against the frame so that it can be easily removed for turning or whatever (I'm not really good about doing that. . .)
So for the cost of two screws, I have a pretty snazzy compost bin! Can't beat that!


