Thursday, February 28, 2013

List of Plants Planned for the Spring 2013 Backyard Garden

Here is a list of the varieties I plan to grow in the garden this season. I will update this as I add more! We will see how this turns out! It is going to definitely be an experiment, since I started the beds from scratch and I am unsure if the beds will receive enough light to produce fruit!

Plants started from seed:

1) 'Long Purple' Eggplant (started inside 2/27/13)


2) 'Scarlet Runner' Pole Beans (will start outside between March 11-15)


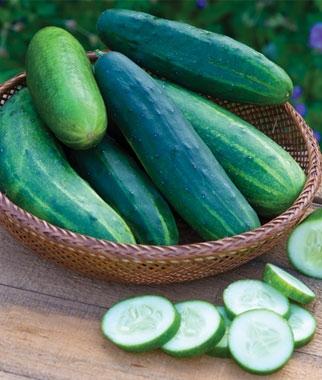
3) 'Salad Slicer' Cucumber (will start outside between Mar. 11-15)


4) Red Leaf Lettuce (started outside around edges of tomato pots 2/27/13)


Transplants:

Peppers
1) Jalapeno Pepper (planted 2/26/13)
2) 'Better Bell' Sweet Pepper (planted 2/26/13)
3) 'Red Beauty (Baron)' Sweet Pepper (planted 2/26/13)
4) Chocolate Bell Sweet Pepper (planted 3/1/13)
5) Golden California Wonder Sweet Pepper (planted 3/1/13)
6) Tabasco Hot Pepper (planted 3/1/13)

Tomatoes
1) 'Yellow Pear' Tomato (planted 2/26/13)
2) 'Homestead 24' Tomato (planted 2/26/13)
3) 'Cherokee Purple' Tomato (planted 2/26/13)
4) 'Sweet 100' Tomato (planted in pot 2/27/13)
5) 'Patio' Tomato (planted in pot 2/27/13)
6) 'Beefmaster' Tomato (planted 3/1/13)
7) 'Better Boy' Tomato  (planted 3/1/13)
8) 'Sunny Boy' Tomato  (planted 3/1/13)
9) Old German Heirloom Tomato  (planted 3/1/13)
10) 'Celebrity' Tomato  (planted 3/1/13)

Pumpkin
1) Pie Pumpkin (planted 2/27/13)

Strawberries
1) 'Sweet Charlie' Strawberries (planted 2/26/13)

Herbs:

1) Sweet Basil
2) 'Red Rubin' Basil (started indoors from seed 2/27/13)
3) Chives (will start from seed outdoors between Mar-May)
4) Cilantro (will start from seed outdoors between Mar-May)
5) Dill
6) Oregano
7) Rosemary
8) Sage
9) German Thyme
10) Curly Parsley
11) Peppermint

Other:

1) 'Lemon Queen' Sunflower (seeds started indoors 2/27/13)


At my community garden plot, I will be doing a "three sisters" planting using sweet corn (which was started from seed indoors today - per a suggestion from one of my gardening books that with care, corn actually can be transplanted successfully), 'Kentucky Wonder' pole beans, and summer squash. More details on that planting later!

Wednesday, February 27, 2013

Backyard Garden Plots DONE!

It has been a while since I posted last, and I meant to document everything we did and how we did it (it took a few weeks to actually get everything done!), but alas I kept forgetting to take pictures, and so all I have at this point are the pictures from today with beds completely built, filled with soil, soil amended, trellises built (except one), and some plants transplanted (despite the fact that the weather has decided to dip into the 30's at night this week).

Here's a reminder of what the backyard looked like before:


And here's what it looks like now (at about 5:30pm with my goofy toddler):


I followed my original plan (discussed in this post) so I ended up with about 172 sq. ft. of raised bed garden space. I am limited somewhat by the available light in the backyard - this area of the yard gets at least a few hours of sunlight all year round, so we'll see how much we can actually grow! The following 6 posts give more details into how we did each step along the way. Happy reading!

Project #1: How to Build a Raised Bed

Project #2: Removal of Sod and How to Double Dig a Bed

Project #3: Addition of Compost and Other Organic Materials

Project #4: How to Amend Soil

Project #5: How to Build a Blackberry Trellis

Project #6: Bean Tepees and Trellises

List of Plants Planned for the Backyard Garden Spring 2013

Project #6: Bean Tepees and Trellises

I decided that I wanted the pretty and productive Scarlet Runner beans:


So, I decided to build two tepees for them. I bought two packages of bamboo stalks (each pack contained 6 stalks for $2.49), arranged them tepee-like, and tied the tops together with extra wire I had laying around from my blackberry trellis project. Super easy - and they stood up through some pretty severe wind we had the other night.


You will notice a trellis in the picture as well. I plan to build another on the other side, as well. I tried first to make a trellis out of the bamboo kind of like this:


But mine didn't really seem all that sturdy or strong. So I scraped that idea and decided to build one more like this that is straight up and down:


To make my trellis, I used 3 5ft wood garden stakes. I cut the point off of one of them with a saw, and then nailed that stake to the tops of the two stakes in the ground. I bought trellis netting and tied it onto the posts and used three anchors along the bottom to keep it tethered to the ground. 

I planted 3 pie pumpkin seedlings that I am going to attempt to train up that thing and hang the pumpkins in a sling (ha ha!). We'll see how that works. I figured it was worth a shot though because I had these three little seedlings that despite all odds, survived in the dirt on the side of our driveway after the parent pumpkins were smashed and chopped for the compost pile. 

Here's one of the pretty seedlings:


I am interested to see how they will grow, or if they will grow. . .


Project #5: How to Build a Blackberry Trellis

I actually completed this before the beds were done, but whatever.

There are a lot of different possibilities for blackberry trellises, but I decided to try the one designed by Dr. Arlie Powell. His system is called "Trellised Production Using Primocane Suppression" or "T-PUPS" for short. With this method, the blackberry plants are essentially espaliered along a two wire trellis.

I did a lot of research into his method after randomly seeing a couple of videos on youtube from him:

Video #1: How to Trellis Blackberries

Video #2: Blackberries Part 2

After watching these videos, the following is what I have done along my side fence:

1) I had 4 bare root Kiowa blackberry plants on order from Ison's Nursery so I decided to buy 6 6ft metal posts (1 for each of the plants and one for each end support).

2) I placed the posts evenly spaced and where I wanted to put the berry plants.

3) I bought green coated wire from the garden section at Lowes and strung one wire 3 ft. from the ground and the second wire 5 ft. from the ground.


During the first year, the plants will be allowed to grow as they will so that they can establish good root systems without me continuously pruning the crap out of them (which is what is required by this system). Next spring, I may get a few berries on the canes that grew haphazardly this year, but after they fruit, they will die. So, I will cut those out and start training the new canes that grow next spring.

Apparently the benefit of doing it this way is that 1) the plants are very productive, and 2) the berries are much easier to pick without getting stuck by all the thorns, and 3) since there aren't any messy canes close to the ground, the do not attract the mice that then attract the snakes. Good enough for me!

Stay tuned for Project #6: Bean Tepees and Trellises!

Project #4: How to Amend Soil


I bought a small, inexpensive kitchen scale off of Amazon.com to help with the measurements (and to hopefully weigh produce one day. . .)

In addition to the scale, I also used my trusty handmade measuring cup.

We are doing an all organic regimen, so after scouring numerous books and other resources, I decided to use the following products (all of which -except the Azomite - could be found at at Lowes, Home Depot, Ace Hardware, or your favorite local nursery):

**Quick note about calculating how much stuff to add - in case you fell asleep during all your science and math classes during high school, here's a quick way to calculate how much product you need using good ol' algebra:

Suppose a product says to apply at a rate of 20 lbs per 1000 sq. ft. but you definitely don't have 1000 sq. ft. - maybe more like one bed that is 28 sq. ft. (like one of mine is). Make an equation and solve for x. Trust me, you can do it. Here's the basic equation:

The way you solve this is by cross multiplication. So . . .

 20 x 28 = 1000x

or

560 = 1000x

To solve for x, divide 560 by 1000.

560/ 1000 = x

x = 0.56 lbs

So to my 28 sq. ft. bed, I need to add 0.56 lbs of product. (This is where having that kitchen scale comes in handy!) Now that you know how to calculate what you need, here are the products I used:

Microlife 6-2-4: This stuff is a locally produced basic organic fertilizer. I don't know if it is available online or outside of the Houston area, but it is awesome stuff.

Application rate: 20 lbs per 1000 sq. ft.

- Blood Meal: good source of quickly available nitrogen (follow directions carefully though because it can be pretty potent!)


Application Rate: It says on the bag that 1 cup covers 20 sq. ft. Since I was already using the Microlife, I decided to not overdo it on the nitrogen, so I used about half the amount (1/2 cup per 20 sq. ft)

- Rock Phosphate: a good source of phosphate (obviously)


Application Rate: 2 lbs per 100 sq. ft

-Texas Greensand: a good source of potassium and trace minerals and is said to help improve clay soils


Application Rate: 10 lbs per 100 sq. ft. (I should note, this was the amount recommended in a book I read, not what is on the package.)

- Azomite (ordered off of Amazon.com): a good source of trace minerals


Application Rate: This product was only used in my potting soil mix, not the raised beds. See the end of the post for the potting soil mix instructions.

-Dry Molasses: is said to increase the biological activity of the soil. Since there was pretty much zero life in there to begin with (there weren't even any bugs - they were all living in the sod roots above the clay), I thought what the heck. . .


Application Rate: 1/2 lb per 100 sq. ft.


For the plants I was planning on potting, I mixed soil according to a recipe found in the book The Vegetable Gardener's Container Bible by Edward C. Smith (awesome book for container gardening, by the way. I reviewed this book here

Mix in a wheelbarrow the following things:

- 1 20 qt. bag of good compost
- 1 20 qt. bag of good quality potting soil
- 1/3 cup greensand
- 1/3 cup rock phosphate
- 1 tablespoon Azomite

The author says he has not had to add anything to the soil in the pots during the growing season, because the mix is sufficient, so we'll see how that goes!

Stay tuned for Project #5: Building a Blackberry Trellis!


Project #3: Addition of Compost and Other Organic Materials


We are lucky to have a fantastic local compost operation, called Nature's Way Resources (they have a lot of great information of their website too!). Their compost looks like a perfectly moist and crumbly chocolate cake.

I figured that to fill my beds about 2" with compost I would need a little over 1 cubic yard total.

You can use a Soil Volume calculator like this one to figure it out - in the height column, just put in how many inches of compost you want to add, rather than the total height of the bed - unless you want to and can afford to add that much compost!) 

However, I am also redoing the large bed in the front yard and had some plants to pot or repot that I wanted to use a little compost in, so I decided to order 2 cubic yards. In addition to that, I got 2 cubic yards of mulch (hey, I wanted to get my delivery fee's worth!). I wish I took a picture of it, but the dump truck came and unloaded a ginormous amount of dirt in our driveway (a fraction of which is still there, covered by a bright blue tarp, and is probably pissing off my neighbors).

Anyways, since the soil was so completely devoid of any organic material, I ended up adding about 1-2 inches of mulch and mixing it all in, smoothing it down, and then adding about 2-3 inches of compost, mixing it in, smoothing it down. Since the soil had been compacted by the rains before the organic material had been added, I basically had to redig the top 12 inches and turn over again. This stage was a lot of work, but hopefully my hard labor will be rewarded.

Stay tuned for Project #4: Amending the Soil!


Project #2: Removal of Sod and How to Double Dig a Bed


Not gonna lie - this part sucked.

And again, we are picture-less. But you can use your imagination.

The sod was super-lustrous and thick and a complete pain in the butt to remove. And once removed, I discovered that we have the worst soil ever - mostly clay with some isolated chunks of builders sand. I'm not kidding - you could literally use the "soil" as modeling clay. It was like digging in Sculpey. Horrible.

Then came the double digging part. Now some people are proponents of the double digging method, others shun it. I figured I'd try it, especially since I had such poor soil to start with. So here is how to prepare a bed double digging style (PS Do not step in your bed at any time!):
       1) Dig a trench about a shovel's depth deep. Put the removed soil in a wheelbarrow (suggested way) or     just off to the side somewhere (lazy back to the land mama way).
       2) Take a pitchfork and stick it in the trench and wiggle fork back and forth to loosen the bottom of the trench. Do this along the whole length of the trench.
       3) Dig another trench alongside the first one you dug and put the soil you are digging up into the first trench.
       4) Keep on repeating these steps until you get to the last trench. This is where you dump the soil you removed from the first trench.
       5) You now should have a lovely fluffy bed with soil that is aerated and loosened to almost two feet down.

Except for that, remember, my soil was clay. After both days that the beds were dug, we had torrential downpours that compacted the soil to even below the bottom of the wood frame! Needless to say after all of my and my husband's hard work, we weren't about to do it again, so I just fluffed it some more when I added compost.

Here's a good site with pictures if you prefer pictures to words:

How to Double Dig a Raised Bed

Stay tuned for Project #3: Addition of Compost and Other Organic Materials!

Project #1: How to Build a Raised Bed

Sorry about the lack of step by step pictures (um, or any pictures for that matter) - I really did intend to take some pics of the process, but oh well. Here's what I did:

The beds are made of cedar boards, which are more expensive but they are fantastic material to use for vegetable beds (as far as wood goes) because cedar is naturally bug and rot resistant, so they will last much longer than, say, untreated pine. I figured out what size boards I needed (per my plan) and had Lowes cut them all for me. I didn't do anything special, or use reinforcements on the corners (we'll see if that matters or not, I guess!). All I did was take some self-drilling deck screws (which were great to use and saved me lots of time not having to drill pilot holes first!) and did two on each corner. If the raised beds were any higher than the 6 inches they are, it probably would have been wise to reinforce the corners but I just needed them to stay together, so I think 2 screws on each corner will do the job. It took a few hours to assemble everything and lay out the beds where I wanted them.

There are many other much better resources on the internet (that have pictures). Here are a few:

Cedar Raised Bed for About $10

Building a Raised Bed

These are great examples if you want a higher bed (about a foot tall). I needed a shorter one for my plan however, so I just screwed boards together and put them in the ground.

Stay tuned for Project #2: Removal of Sod and Double Digging the Beds!

How to Make a Measuring Cup From a Plastic Party Cup

I wanted to have a measuring cup for exclusive garden use, but I didn't feel like buying one (plus, I needed one immediately and didn't want to use my kitchen measuring cups for fertilizer, organic though it may be).

I had some leftover plastic cups from the toddler's birthday party so I took one of those. . .


I needed 1/2 cup and 1 cup increments, so I first got one of my kitchen measuring cups, filled it with 1/2 cup water, and poured it in the cup. I then took a sharpie and drew a line at the water level in the cup and labeled it "1/2 cup". I did the same thing for "1 cup".

Unfortunately, I did not take a picture so below is a Microsoft Paint rendition of my measuring cup:


Voila! Instant measuring cup that I don't care if it gets crushed or lost!